Easy No Bake Cheesecake Jars Picnic – Perfect for Dinner
Master the Art of Making No Bake Cheesecake Jars Picnic
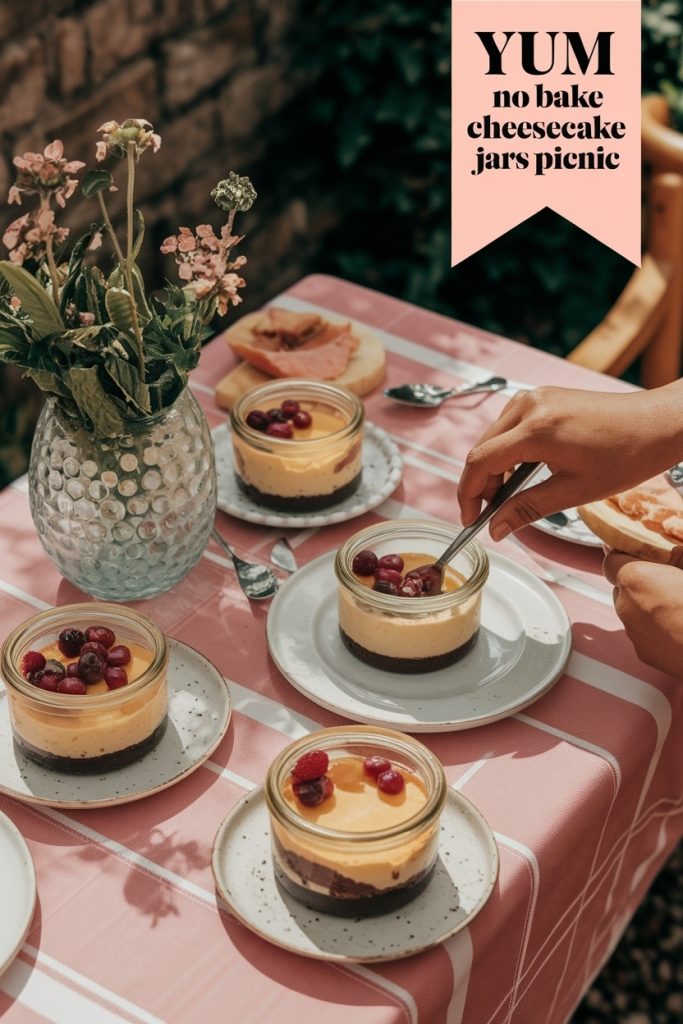
Get ready to elevate your picnic game with these delightful no bake cheesecake jars! Perfect for enjoying outdoors, these portable cheesecake treats are not only visually appealing but also incredibly easy to assemble, making them ideal individual cheesecake servings for any gathering. Layered cheesecake jars filled with creamy goodness and your favorite toppings can be made ahead of time, ensuring a stress-free dessert option that will impress your friends and family while adding a sweet touch to your sunny outings.
For a delightful twist, layer your no-bake cheesecake jars with a mix of crushed graham crackers and seasonal fruits for added texture and flavor!
Gather Your Ingredients & Tools

| Ingredient | Quantity | Notes |
|---|---|---|
| Cream Cheese | 8 oz | Use full-fat for a rich flavor in layered cheesecake jars. |
| Granulated Sugar | 1/2 cup | Sweeten your no bake dessert jars to taste. |
| Heavy Whipping Cream | 1 cup | Whip until stiff peaks form for a fluffy texture in individual cheesecake servings. |
| Graham Cracker Crumbs | 1 cup | Use for the base layer in mason jar cheesecake; adds crunch. |
| Vanilla Extract | 1 tsp | Enhances flavor in your portable cheesecake. |
| Fresh Berries | 1 cup | Add on top for a refreshing touch in picnic dessert jars. |
Tips
- Use coconut cream instead of heavy cream for a dairy-free alternative.
- Seal the jars tightly with lids to prevent any moisture or odors from affecting the cheesecake.
Essential tools: nonstick pan, medium pot, oven or air fryer, and a blender if needed.
These essentials keep the no bake cheesecake jars picnic balanced and consistent every time.
Additional notes: includes make ahead cheesecake for completeness.
How to Make No Bake Cheesecake Jars Picnic Step by Step
- Gather all your ingredients: cream cheese, sugar, vanilla extract, heavy cream, and your choice of graham cracker crumbs or cookie crumbles.
- In a mixing bowl, beat together the cream cheese, sugar, and vanilla extract until smooth and creamy.
- In a separate bowl, whip the heavy cream until stiff peaks form.
- Gently fold the whipped cream into the cream cheese mixture until well combined.
- Prepare your jars or containers for serving.
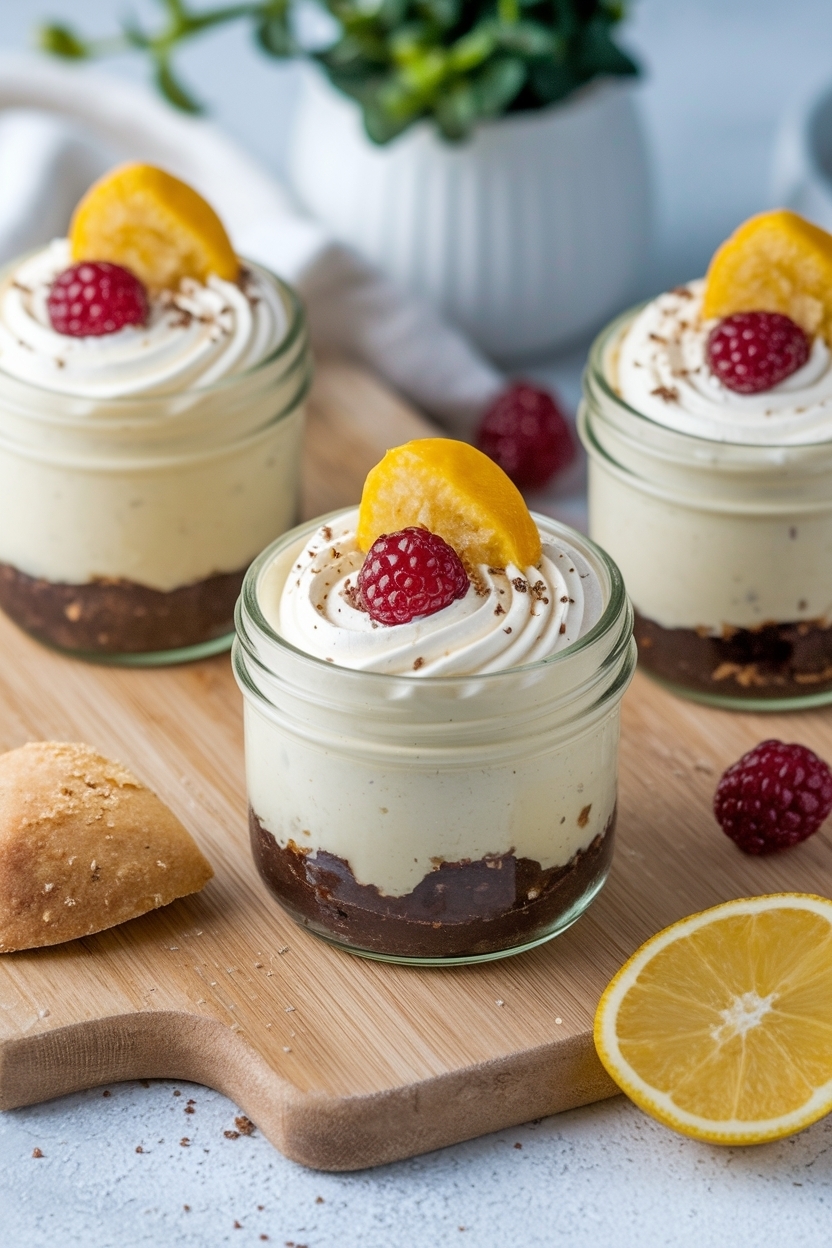
- Start by adding a layer of graham cracker crumbs or cookie crumbles at the bottom of each jar.
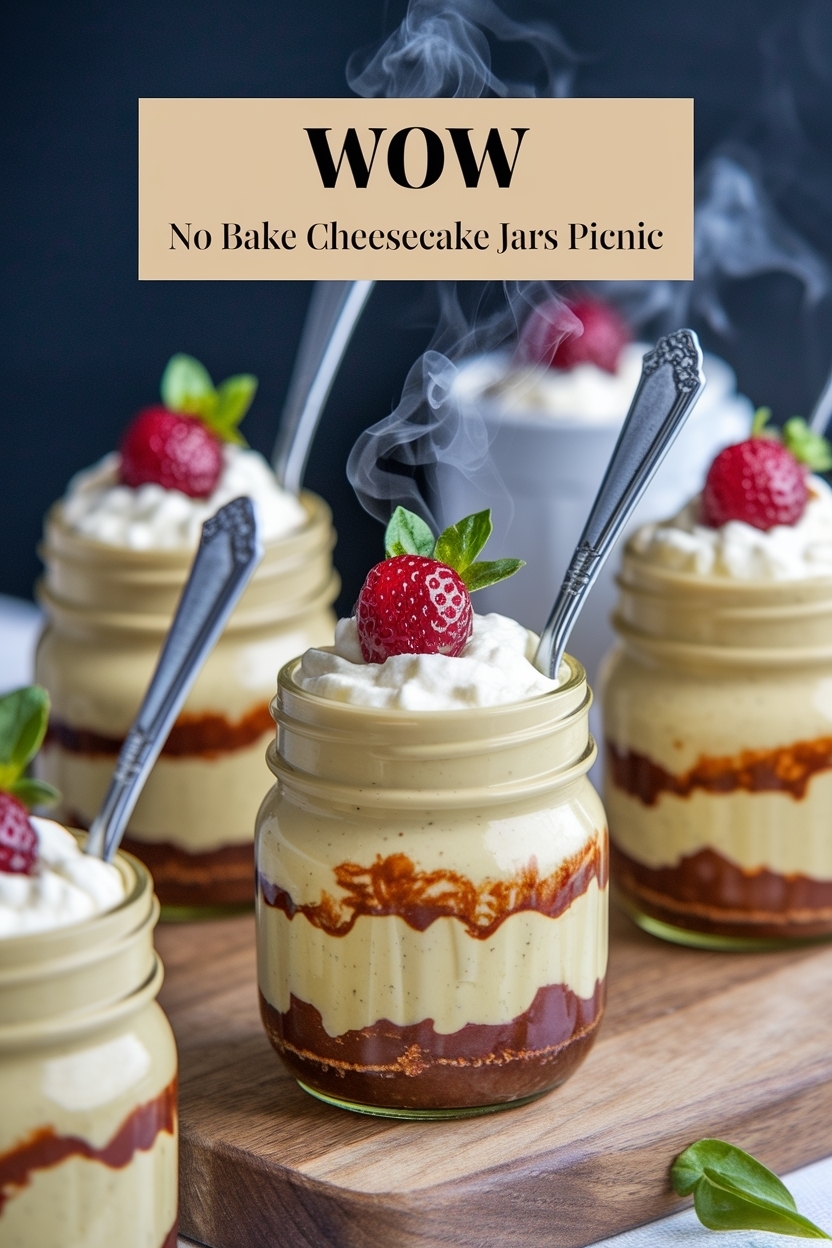
- Next, spoon a layer of the cheesecake mixture on top of the crumbs.
- Repeat the layering process until the jars are filled, finishing with a layer of the cheesecake mixture.
- Chill the jars in the refrigerator for at least 2 hours to set.
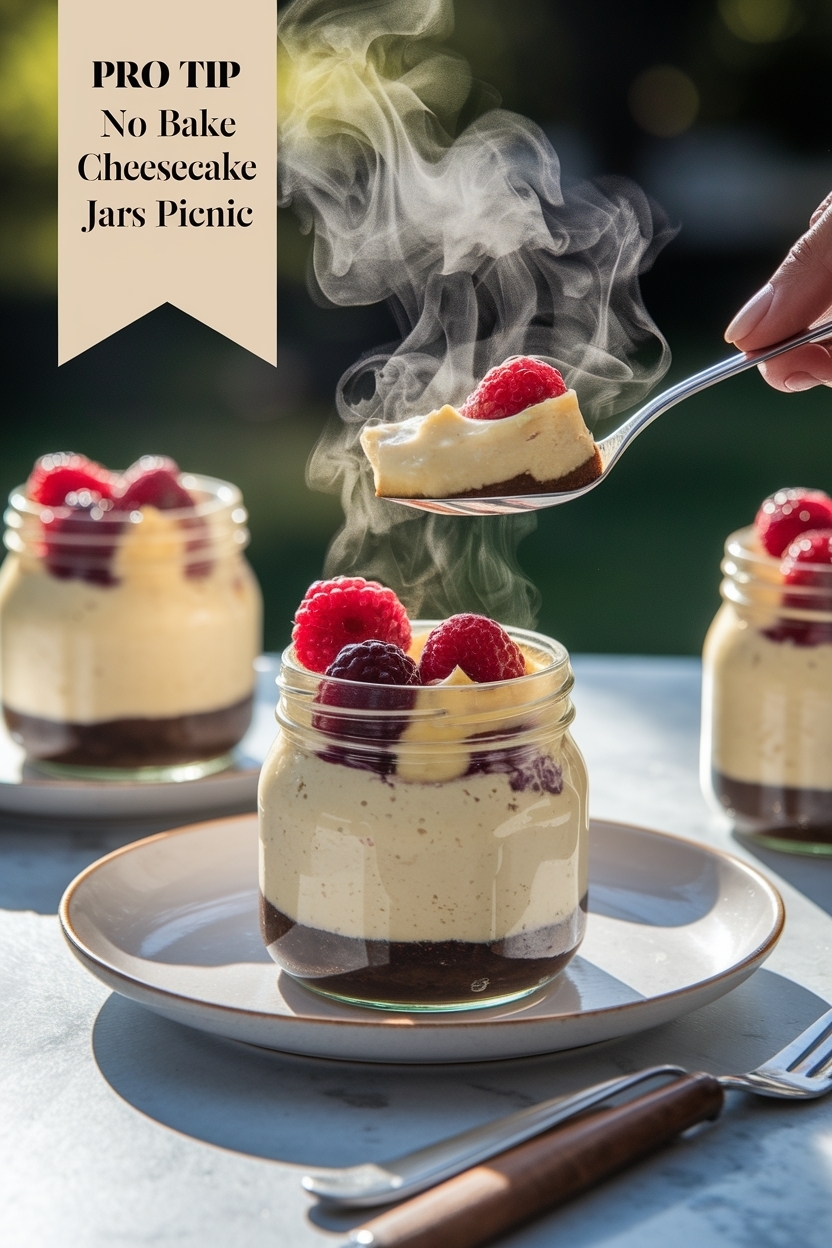
- Before serving, top with fresh fruit, chocolate sauce, or a drizzle of caramel if desired.
- Pack the jars carefully for your picnic and enjoy!
Chef tip: Season in layers and adjust to taste.
Flavor & Texture Secrets
| Flavor Element | Ingredient | Role |
|---|---|---|
| Sweet | Cream Cheese | Main Ingredient |
| Creamy | Heavy Whipping Cream | Texture Enhancer |
| Crunchy | Graham Cracker Crumbs | Base Layer |
| Fruity | Fresh Berries | Topping for Picnic Dessert Jars |
| Rich | Chocolate Sauce | Drizzle for Individual Cheesecake Servings |
- Add-ins: herbs, spices, citrus zest, and dressings.
This fiber-rich combo makes it both filling and nutritious.
How to Serve No Bake Cheesecake Jars Picnic
- Meal Prep: Prepare a batch of make-ahead quinoa salad packed with colorful veggies and protein to enjoy throughout the week.
- Brunch: Whip up a delicious mid-morning feast featuring fluffy pancakes topped with seasonal fruits and maple syrup.
- Family Dinner: Serve a hearty home-cooked casserole that combines pasta, cheese, and your favorite vegetables for a comforting meal everyone will love.
| Occasion | Pairing Dish | Beverage |
|---|---|---|
| Casual Get-Together | Bruschetta with Tomatoes and Basil | Sauvignon Blanc |
| Game Day | Buffalo Wings | IPA Beer |
| Romantic Dinner | Filet Mignon | Cabernet Sauvignon |
Explore related ideas here: more recipes. This reinforces no bake cheesecake jars picnic enjoyment.
Serving Size Adjustments
| Ingredient | x1 | x2 | x4 |
|---|---|---|---|
| Base Grain | 1 cup | 2 cups | 4 cups |
| Protein | 1 serving | 2 servings | 4 servings |
| Veggies | 2 cups | 4 cups | 8 cups |
Scaling preserves the nutrition balance of no bake cheesecake jars picnic and its components (e.g., fiber/protein ratio). Try a batch cook for weeklong ease.
Allergy-Friendly & Diet Swaps
| Variant | Swap | Notes |
|---|---|---|
| Standard | As written | Balanced texture and flavor |
| Vegan | Use tofu or legumes | Plant protein emphasis |
| Gluten-Free | Use GF grains | Check labels for cross-contamination |
| Keto | Swap grains for greens | Keep fats moderate |
- Swap smartly to maintain structure.
- Adjust seasoning to fit each variant.
This ensures no bake cheesecake jars picnic fits your dietary needs.
Troubleshooting: Common Mistakes to Avoid
- Issue: Difficulty in transporting desserts — Fix: Use portable cheesecake options like layered cheesecake jars in mason jars for easy transport.
- Issue: Cheesecakes melting during outdoor events — Fix: Opt for no bake dessert jars, ensuring they stay cool and stable for picnics.
- Issue: Serving size confusion with large cakes — Fix: Create individual cheesecake servings in small jars for easy portion control.
- Issue: Time constraints for dessert preparation — Fix: Make ahead cheesecake recipes that can be prepared in advance and stored in picnic dessert jars.
Keep no bake cheesecake jars picnic balanced with mindful timing and seasoning.
Nutritional Highlights
| Calories | ~450 |
| Protein | ~20g |
| Carbs | ~55g |
| Fat | ~15g |
| Fiber | ~12g |
| Key Nutrients | Iron, Vitamin C, Folate |
- Fiber-packed and satiating.
- Protein-rich for recovery.
- Balanced bowl for daily energy.
Dietitian tip: Keep the no bake cheesecake jars picnic colorful and balanced for micronutrients.
Key Takeaways
- Main technique: build layers with no bake cheesecake jars picnic.
- Nutritional benefit: emphasize mason jar cheesecake.
- Texture/taste: contrast crunchy and creamy elements.
- Serving flexibility: great for meal prep or sharing.
- Prep efficiency: use batch-cooked bases.
Faqs
- Q: What is a delightful and easy dessert option for a picnic that can be served in individual portions?
No bake cheesecake jars are the perfect picnic treat, combining convenience and deliciousness in a portable format. Using mason jars, you can layer creamy cheesecake filling with your favorite toppings, such as fresh fruits, chocolate, or graham cracker crumbs, creating an attractive and customizable dessert. These individual servings not only make for easy transport but also eliminate the need for utensils, allowing you to enjoy a sweet, refreshing bite wherever you are in the great outdoors.
- Q: What’s a perfect treat for a picnic that’s both delicious and portable? A: No bake cheesecake jars filled with creamy goodness are the ideal portable cheesecake option!
No bake cheesecake jars are the perfect portable dessert for a picnic, offering a delicious and easy way to enjoy creamy cheesecake without the hassle of baking. Simply layer a graham cracker crust, smooth cheesecake filling, and your favorite toppings in individual jars for a charming and convenient treat that can be transported effortlessly. These delightful jars not only save time but also minimize mess, making them an ideal choice for outdoor gatherings.
- Q: How can I easily prepare individual no bake cheesecake jars for a delightful picnic treat?
No bake cheesecake jars are the perfect picnic treat, offering individual servings of creamy deliciousness that are easy to transport and serve. Layered in small jars, these cheesecakes can be customized with various toppings like fresh fruits, chocolate, or caramel, making each jar a delightful surprise. Their convenience and lack of baking make them a go-to choice for outdoor gatherings, ensuring everyone can indulge in a sweet, refreshing dessert without the fuss.
- Q: What’s the perfect picnic dessert that’s both delicious and effortless to make? A: No bake cheesecake jars, the ideal treat for enjoying outdoors!
No bake cheesecake jars are the perfect dessert for a picnic, offering a delightful combination of creamy cheesecake layers and crunchy graham cracker crumbs, all neatly packed in portable jars. These individual servings allow for easy transport and minimal mess, making them an ideal sweet treat to enjoy outdoors. You can customize them with various toppings like fresh fruit, chocolate sauce, or caramel for added flavor, ensuring that your picnic dessert is both delicious and visually appealing.
- Q: How can I create delicious no bake dessert jars for a perfect picnic cheesecake experience?
No bake cheesecake jars are the perfect sweet treat for a picnic, combining creamy cheesecake filling with a crunchy graham cracker crust, all beautifully layered in portable jars. These delightful no bake dessert jars can be customized with various toppings like fresh berries, chocolate sauce, or fruit compote, making them not only delicious but also visually appealing. Easy to prepare ahead of time, they offer a hassle-free option for enjoying a delectable dessert outdoors without the need for
No Bake Cheesecake Jars Picnic |
|
|---|---|
| breakfastideas.site | |
| Love it? Save this recipe for future delicious moments! | |
| Preparation time: 15 minutes | Cooking time: 0 minutes | |
Ingredients |
|
| Ingredient | Amount |
| Cream Cheese | 8 oz |
| Granulated Sugar | 1/2 cup |
| Heavy Whipping Cream | 1 cup |
| Graham Cracker Crumbs | 1 cup |
| Vanilla Extract | 1 tsp |
| Fresh Berries | 1 cup |
Directions |
|
| Step 1: Gather all your ingredients: cream cheese, sugar, vanilla extract, heavy cream, and your choice of graham cracker crumbs or cookie crumbles. | |
| Step 2: In a mixing bowl, beat together the cream cheese, sugar, and vanilla extract until smooth and creamy. | |
| Step 3: In a separate bowl, whip the heavy cream until stiff peaks form. | |
| Step 4: Gently fold the whipped cream into the cream cheese mixture until well combined. | |
| Step 5: Prepare your jars or containers for serving. | |
| Step 6: Start by adding a layer of graham cracker crumbs or cookie crumbles at the bottom of each jar. | |
| Step 7: Next, spoon a layer of the cheesecake mixture on top of the crumbs. | |
| Step 8: Repeat the layering process until the jars are filled, finishing with a layer of the cheesecake mixture. | |
| Step 9: Chill the jars in the refrigerator for at least 2 hours to set. | |
| Step 10: Before serving, top with fresh fruit, chocolate sauce, or a drizzle of caramel if desired. | |
| Step 11: Pack the jars carefully for your picnic and enjoy! | |
Final Thoughts
no bake cheesecake jars picnic brings comfort and flavor to every table. Save and share your twist with fresh ideas and a mindful balance.
Pin this no bake cheesecake jars picnic and try your twist with make ahead cheesecake today.